Choosing front doors with glass is not only a design decision. It affects daylight, privacy, security, insulation, and daily comfort. A beautiful entryway can still feel cold, noisy, or exposed if its glass and frame are poorly matched.
Start by studying your home’s architecture, climate, and entrance direction. A south-facing door may need low-emissivity glass to reduce heat gain. In colder regions, double glazing and insulated frames can help limit drafts. Tempered or laminated glass offers added protection, but the correct option depends on the door design and local building requirements.
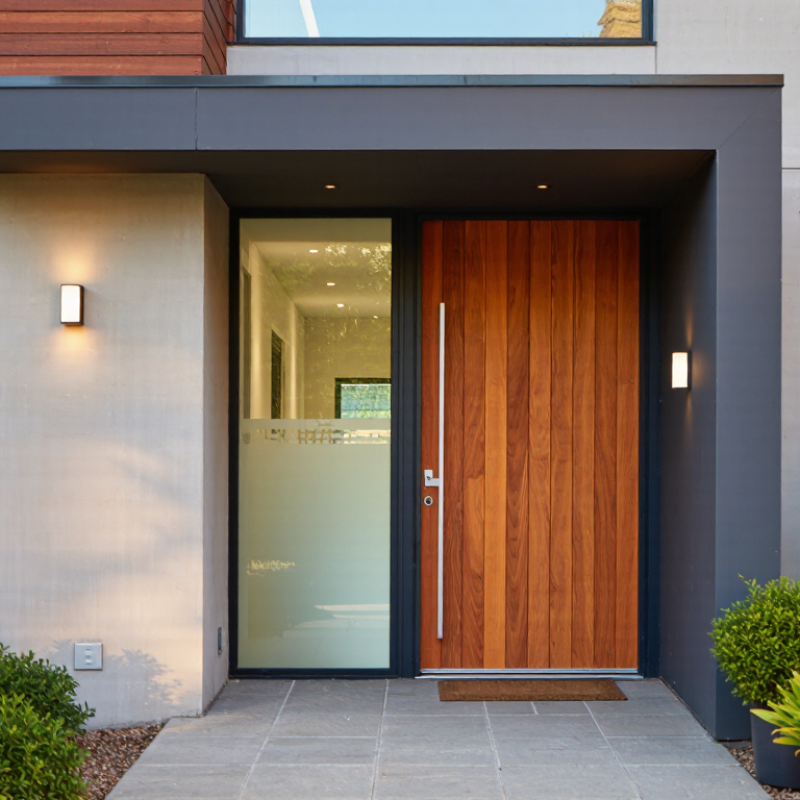
Privacy deserves careful attention. Clear glass creates a bright hallway, yet it may display your living space to visitors after dark. Frosted, textured, or partially covered glass can soften that concern without blocking every ray of light. Stand outside your home in the evening and look inward. It is a simple test, but many homeowners skip it.
Reliable selection also means checking the manufacturer’s specifications, warranty, installation guidance, and independent product testing. Ask how the glass performs under impact, weather exposure, and repeated use. A door should close firmly without forcing the latch. Small details matter.
There is no perfect choice. More glass can bring warmth and character, but it may reduce privacy or increase maintenance. Consider fingerprints, rain marks, condensation, and changing sunlight before deciding. An experienced installer can identify problems that photographs often hide. The best front doors with glass should suit your home, your habits, and your sense of security, not merely follow a current trend.
A glass front door should solve a daily problem, not merely brighten the entrance.
Begin by observing your hallway at different times. Morning glare may reveal details that an evening visit misses. Note drafts, street noise, nearby windows, and how easily visitors can see inside.
Decide what you want the door to achieve. A clear panel can welcome daylight, while frosted or textured glass protects privacy. If children, pets, or frequent deliveries shape your routine, consider visibility and impact resistance.
Laminated or tempered safety glass can offer stronger protection than ordinary glass. Check the frame, hinges, lock, and threshold as one system. A beautiful panel cannot compensate for a weak installation.
Climate matters too. In a cold area, ask about insulated glazing and air leakage. In a sunny climate, low-emissivity glass may help control heat and fading. Measure the entry carefully, including wall depth and swing clearance.
I once focused too much on appearance and underestimated cleaning effort around a detailed glass pattern. That choice looked impressive, but fingerprints appeared quickly. Think honestly about maintenance.
Also review applicable building requirements with a qualified installer, especially for safety glazing and accessible entry dimensions. A small sample beside your flooring can expose an awkward color mismatch before ordering.
Glass type changes both daylight and privacy. Clear glass delivers the brightest entryway, but it also reveals coats, shoes, and family movement. Frosted or acid-etched glass scatters views while preserving useful daylight. Textured glass adds visual distortion, although its privacy can vary with lighting. Laminated glass includes a bonded interlayer and can reduce dangerous splintering if broken. Privacy is personal. Test it at night.
The U.S. Department of Energy reports that windows can represent 25–30% of residential heating and cooling energy use. A glazed door can contribute to similar comfort concerns, especially on an exposed entrance. Check the National Fenestration Rating Council label for U-factor, solar heat gain coefficient, and visible transmittance.
Key rating considerations Lower U-factor generally improves insulation. Higher visible transmittance brings more daylight, but may increase glare or summer heat. A south- or west-facing door deserves careful solar-control glass selection.
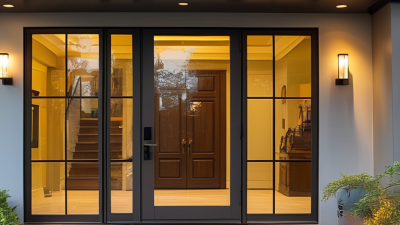
For privacy, compare the glass from both sides at daytime and after sunset. Interior lights can reverse expectations: a door that looks private outdoors at noon may become transparent at night. Curtains or adjustable shades provide flexibility, but they can weaken the daylight benefit.
In my experience, homeowners often choose the darkest glass, then regret the dim hallway. A moderate privacy pattern with a narrow clear section may work better. Local climate, entry orientation, and nearby sightlines should guide the final choice. NFRC ratings help, but they cannot measure how comfortable the doorway feels in daily use.
How to Choose Front Doors With Glass for Your Home?
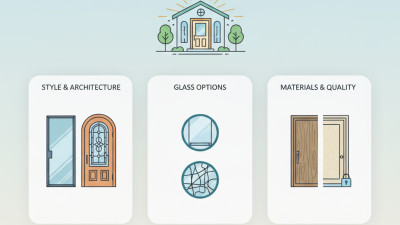
A glass front door should fit the home’s materials, proportions, and daily routines. Consider the building’s visual language before choosing a design. A timber door can soften brick walls, while a steel or fiberglass door suits clean, modern lines. Match the glass frame with nearby window frames for a more deliberate appearance. Black hardware may sharpen a pale façade, but warmer finishes can support stone or wood details. Measure the entry carefully. A wide door can look impressive, yet it may overwhelm a narrow porch.
Tips: Compare glass textures in daylight and at night. Clear glass brings brightness, but textured or frosted glass offers more privacy. Low-emissivity glazing can reduce heat transfer. In colder or hotter regions, ask a qualified installer about insulation values and weather seals. Check that the swing direction leaves space for furniture, lighting, and safe movement.
Architectural features should guide the final balance. A fanlight can echo a curved roofline, while vertical glass panels can reinforce tall windows. Keep sightlines in mind from the street and from inside the hallway. I once chose a beautiful oversized glass panel that made a small entrance feel exposed. The lesson was useful, but not flawless. Door style also affects maintenance. Coastal air, strong sun, and frequent rain can age finishes quickly. Request product documentation, installation details, and warranty terms before ordering. A professional site assessment can reveal drainage or threshold problems that sketches often miss.
Visible light transmittance indicates how much daylight passes through the glass. Clear glass works well with traditional wood doors and homes that prioritize daylight, while frosted and textured glass provide more privacy for contemporary, craftsman, and transitional entrances. Tinted glass suits modern designs with strong sun exposure, and Low-E clear glass is a practical choice for energy-conscious fiberglass, steel, or wood doors. Actual performance varies by glazing thickness, coatings, and manufacturer.
In my experience, laminated or multi-layered tempered glass offers a stronger balance than basic single-pane glass. Laminated glass can stay together after impact, while tempered glass breaks into smaller pieces. Ask whether the door includes a multi-point lock, reinforced hinges, and a protected cylinder.
The frame matters too. A beautiful panel cannot compensate for weak installation. Check the fit around the threshold, especially near the corners. Small gaps can invite drafts and water.
Look for low-emissivity glazing, insulated cores, tight weatherstripping, and a thermally improved frame. On a cold morning, touch the interior glass edge. Persistent condensation may indicate high humidity, poor ventilation, or a cold bridge. It is a clue, not a final diagnosis.
For storm-prone areas, review tested air, water, and wind resistance ratings. A broad glass panel can brighten an entry, yet it may increase heat gain and glare. Exterior shading can help, but it is not always practical. Consider the doorway’s direction, roof overhang, and local climate.
I once underestimated afternoon sun in a west-facing entry. The hallway became uncomfortably warm. That mistake changed how I evaluate doors.
Request installation details, warranty terms, and documented test results. If the installer cannot explain drainage paths, sealing layers, and threshold protection, pause before ordering.
How to Choose Front Doors With Glass for Your Home?
Start with the entryway, not the door catalog. Measure the existing door slab, frame, rough opening, and wall thickness. Record the width at the top, middle, and bottom. Small differences matter. Check the sill for rot, uneven flooring, or water stains. Measure nearby walls and steps too, because a wider door may change movement around the entrance. Confirm the door swing and available clearance before choosing a glass design.
Set a realistic budget that includes more than the door itself. Include hardware, trim, delivery, old-door removal, repairs, and installation labor. Energy-efficient glass and stronger frames may cost more, but they can improve comfort near the entrance. Ask for a written estimate with each task listed. My rough estimates have often missed small finishing costs. That is worth remembering. Leave room for surprises, especially in older homes.
Plan installation around weather and daily routines. A professional installer should inspect the opening, level the frame, secure the unit, and seal vulnerable joints. Proper flashing helps direct rain away from the wall. The glass should suit the climate, privacy needs, and local safety requirements. Confirm requirements for safety glazing before ordering. Arrange a temporary entrance if the work takes several hours. After installation, test the lock, hinges, weather seal, and drainage. Even a beautiful door feels wrong when it sticks after rain.
| Planning Dimension | What to Measure or Decide | Typical Residential Data | Recommended Choice | Why It Matters | Planning Note |
|---|---|---|---|---|---|
| Entryway Width | Measure the rough opening between the interior sides of the framing, not only the existing slab. | Common single-door widths are 30, 32, and 36 inches. A 36-inch door provides the most comfortable everyday passage. | Choose a 36-inch single door when the opening and wall structure allow it. | A wider opening improves movement for furniture, strollers, and accessibility. | Record the width at the top, middle, and bottom because openings may not be perfectly square. |
| Entryway Height | Measure from the finished floor to the top of the rough opening. | Standard exterior door heights are commonly 80 inches, with 96-inch options used in taller designs. | Use an 80-inch door unless the existing framing is designed for a taller unit. | The height affects the door size, frame fit, sidelites, and installation cost. | Measure after accounting for flooring, thresholds, and any planned floor replacement. |
| Door Configuration | Decide between a single door, a door with one sidelite, two sidelites, or a transom. | A single door uses less wall width; sidelites and transoms add fixed glass beside or above the door. | Select a single door for compact entries and add glass panels only when the opening is wide enough. | The configuration determines daylight, privacy, structural requirements, and total glass area. | Confirm that nearby walls, switches, railings, and furniture will not obstruct the swing. |
| Door Swing | Identify whether the door should be left-hand or right-hand inswing or outswing. | Most homes use an inswing entry door, but local conditions and building requirements can vary. | Match the new swing to the existing entry layout unless a building professional recommends a change. | The swing affects circulation, weather exposure, security hardware, and emergency egress planning. | Check the hinge side while standing outside and facing the door. |
| Glass Area | Choose how much of the door or surrounding unit will contain glazing. | Common designs range from a narrow vision panel to full-lite glass covering most of the door slab. | Use a half-lite or three-quarter-lite design for a balance of daylight and privacy. | More glass increases natural light but can affect privacy, heat gain, and cleaning needs. | Consider frosted, textured, or patterned glass when the entry faces a street or neighboring home. |
| Safety Glazing | Verify that glass near the floor, doors, and walking areas meets applicable safety-glazing requirements. | Tempered and laminated glass are common safety options; exact requirements depend on location and code. | Request safety-rated glazing for door glass and confirm compliance with local building regulations. | Safety glazing is designed to reduce injury risk if the glass is broken or impacted. | Ask the installer to identify the glass type and provide documentation when required. |
| Energy Performance | Compare the complete door unit, including the frame, glass, edge seals, and threshold. | Look for published U-factor and solar heat gain coefficient values; lower U-factor generally indicates better insulation. | Choose a double-pane insulated glass unit with low-emissivity coating for many conditioned homes. | The whole-unit performance is more useful than evaluating the glass alone. | Climate, orientation, shading, and local energy requirements should guide the final specification. |
| Privacy Level | Decide how clearly people outside should be able to see through the glass. | Clear glass offers the highest visibility; textured, frosted, and decorative glass provide progressively more privacy. | Use privacy glass when the entry is close to a sidewalk, driveway, or neighboring property. | Privacy choices affect daylight, appearance, and whether window coverings will be needed. | View samples in both daylight and nighttime conditions before ordering. |
| Material Selection | Compare the door slab and frame materials for climate, maintenance, and appearance. | Fiberglass and steel are common low-maintenance options; solid wood requires more regular protection. | Choose a material that matches the local weather exposure and maintenance capacity. | Material influences durability, insulation, weight, finish longevity, and repair requirements. | A protected entry can reduce exposure to direct rain and ultraviolet light. |
| Budget Planning | Set a budget for the complete project rather than the door slab alone. | Typical cost categories include the unit, removal, labor, flashing, trim, hardware, disposal, and repairs to framing. | Reserve an additional 10%–20% for concealed damage or opening adjustments. | Older homes may require sill, framing, waterproofing, or interior and exterior trim work. | Request itemized estimates so material, labor, permits, and finishing costs are easy to compare. |
| Hardware | Select the lockset, deadbolt, handle style, hinges, closer, and optional security accessories. | Most entry doors use a latch and a separate deadbolt; hardware backset commonly measures 2-3/8 or 2-3/4 inches. | Confirm hardware dimensions and handing before the door is ordered. | Incorrect hardware preparation can delay installation or require drilling and replacement parts. | Choose corrosion-resistant hardware for coastal or high-humidity locations. |
| Weatherproofing | Plan for a sill pan, flashing, weatherstripping, sealant, and proper drainage at the threshold. | A complete installation should manage water around the rough opening and maintain a continuous air seal. | Use installation methods appropriate for the wall type, cladding, and local weather conditions. | Good water management helps prevent drafts, leaks, rot, and damage around the opening. | Do not rely on surface caulk alone to replace correctly integrated flashing. |
| Installation Time | Allow time for removal, opening preparation, fitting, shimming, sealing, hardware, and cleanup. | A straightforward replacement often takes several hours; structural repairs or custom units can extend the schedule. | Schedule the work when the entry can remain protected and accessible for the full installation period. | Unexpected framing damage, uneven floors, or delayed materials can affect completion. | Keep the old door available until the new unit is installed and inspected. |
| Final Inspection | Test operation, locks, seals, glass condition, threshold contact, and water-shedding details. | The door should open and close smoothly, latch securely, and remain aligned without excessive force. | Complete a daylight and nighttime check for drafts, gaps, visibility, and exterior lighting. | A final inspection catches adjustment and sealing problems before the installer leaves. | Required before sign-off |